Software Product Guide to Know How It Works
Complete step by step information is discussed here, about the product working criteria with the help of product screenshot. The software screenshot makes the complete process easier to understand. Take a look on working of software:
Step 2
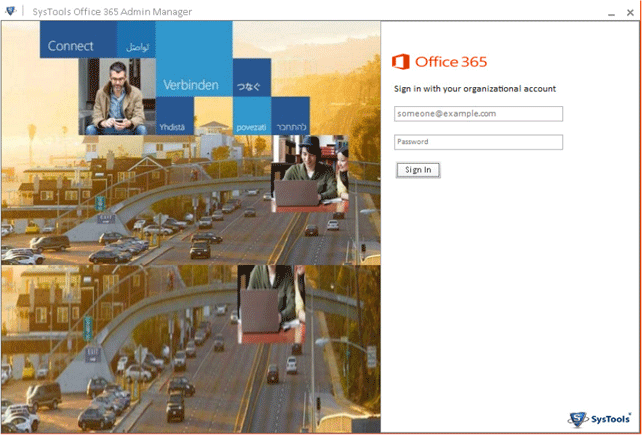
Click Start Button >> All program >> Place cursor to Office 365 Admin Manager and open it. As you open it automatically redirects user to Office 365 Admin sign in page. Provide User ID and Password and log-in to account.
Step 3
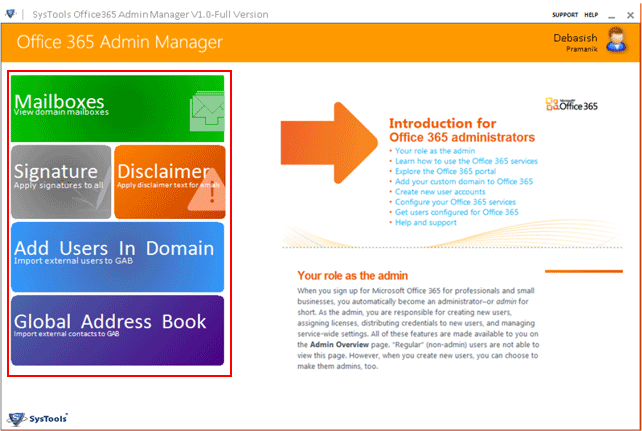
After the successful login, software will display the main screen with its multiple lists of features.
The features of the software are listed below:
- Mailboxes:View, Open and analyses all mailboxes usage quota
- Signature: Apply signature to all the email recipient of Office 365
- Disclaimer: Add a common disclaimer message to all outgoing emails of Office 365 user accounts
- Add User in Domain: Add and modify the existing user information
- Add Contact to GAB: Add external contact
Step 4
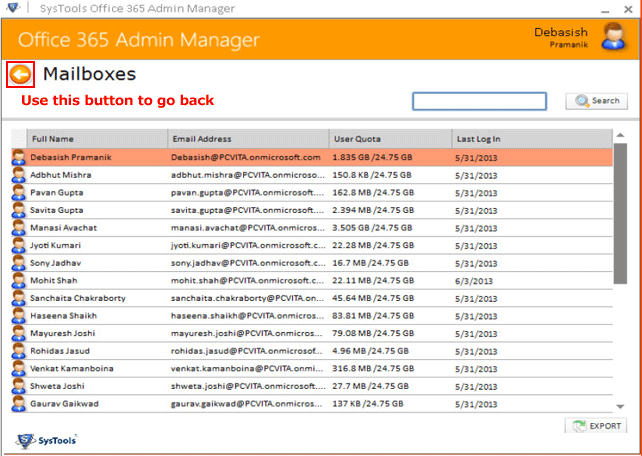
Begin mailboxes, Click mailboxes tab to view & open details of the all mailboxes present under specific domain.
Step 5
Search any mailbox after providing name of user or Export the results of mailboxes into CSV file format using EXPORT button.

Step 6
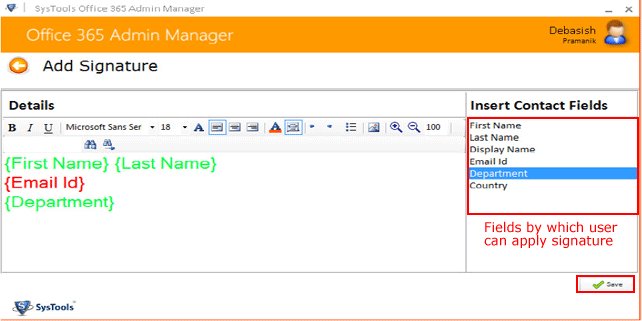
To add Signature click to signature tab Insert Contact Field present in the right hand side. Edit field names with the original name and click to SAVE button to apply signature.
Step 7
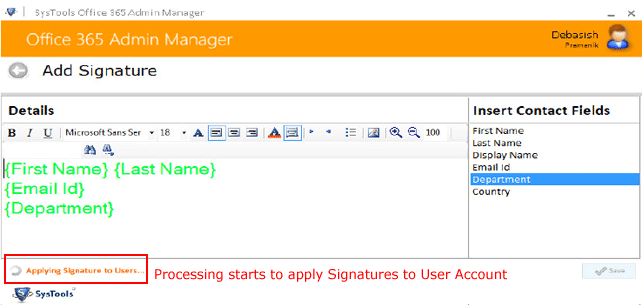
User need to wait till signature applied to user accounts.
Step 8
Click the OK button when the screen pop up a confirmation message that signature is applied successfully.

Step 9
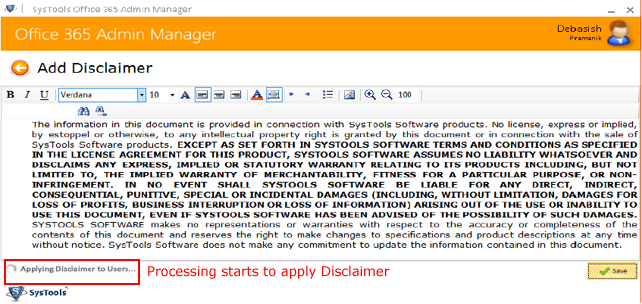
Add disclaimer message by clicking on the disclaimer tab. Add the message on the space provided with RTF. Click to SAVE button to apply a common disclaimer message to all outgoing emails.

Step 10
Wait till the process get over to applying disclaimer and when a confirmation message appears on the screen. Click to OK button.
Step 11
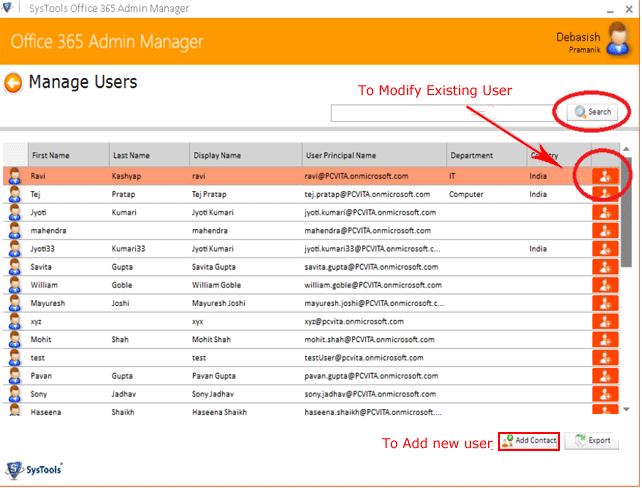
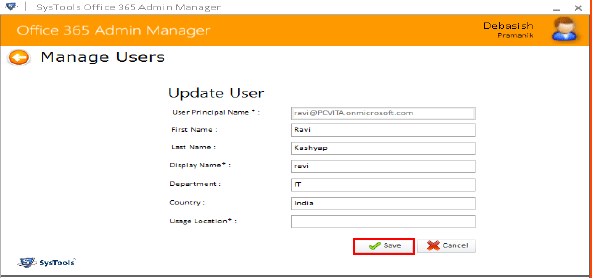
Manage all users' accounts, add new user or modify the existing user. This allows managing all users present under the same domain at once. To modify existing user click the icon and modify details. To search any user mailbox enter the name the click to SEARCH option. User can also add new contact by clicking on Add Contact.
Step 12
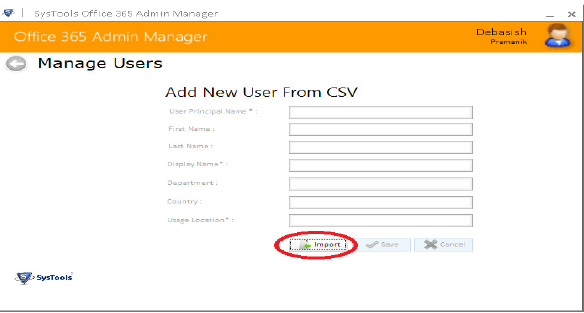
Add new user by filing all details: User Principal Name, First Name, Last Name, Display Name, Department, Country, and Usage Location.

Step 13
To make this process time efficient user can also import all the details through CSV file format to add multiple users at once. Just Click IMPORT button browse the CSV file from the machine.
Step 14
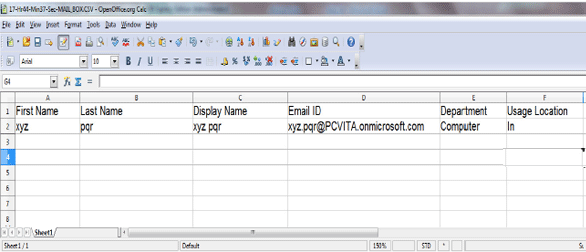
Must confirm that the CSV file must be in the given format.
Step 15
Click to SAVE button after providing details to add new user.
Step 16
Click to add external contact tab to add more contact on office 365 specified domain click to save button after providing details.

Step 17
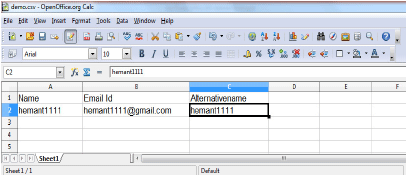
User can also add information through CSV file. Must ensure the format must be same as given below.
Step 18
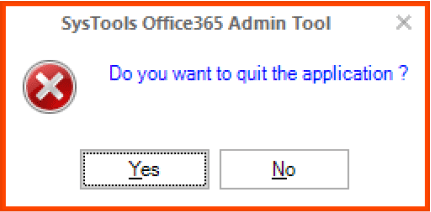
Close the application by clicking on Yes
