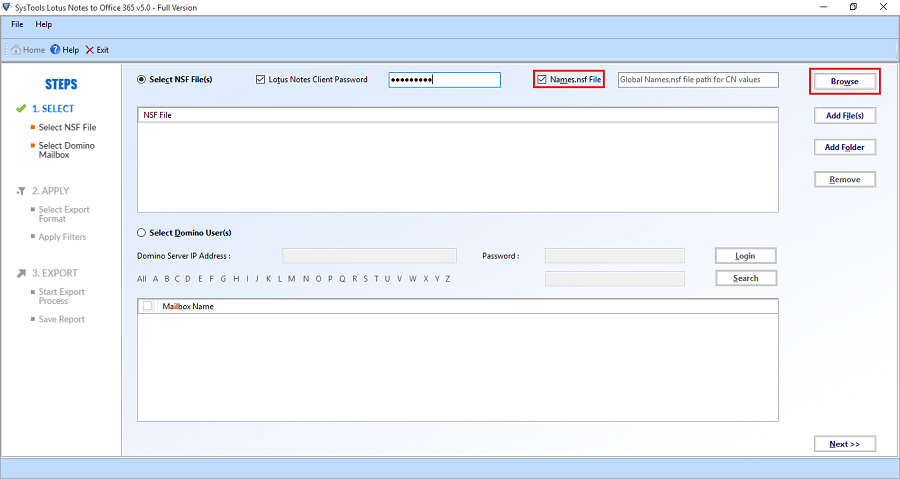
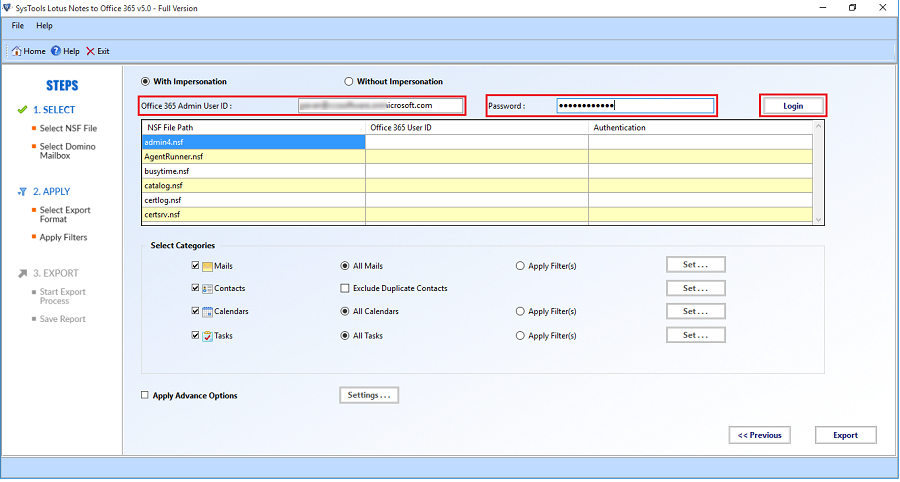
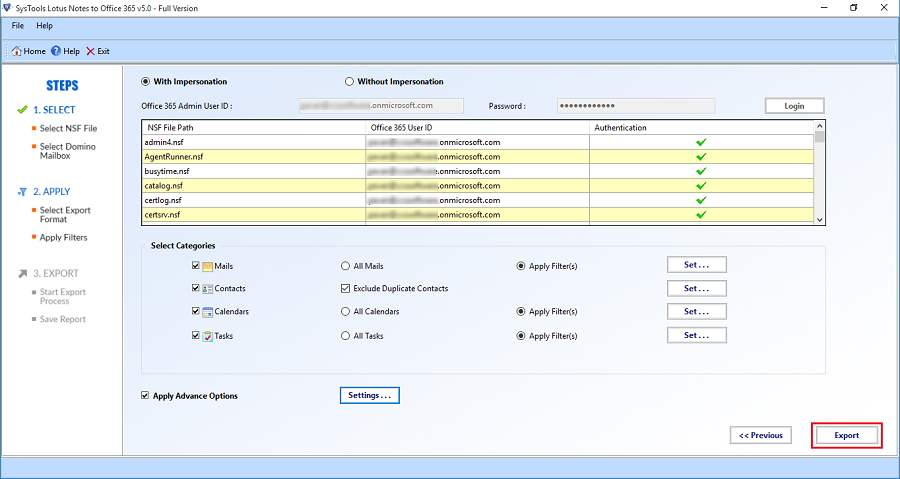
The data can also be accessed through the Domino server. Provide the Credentials for the Domino server as follows:

Click on the "Login" button.
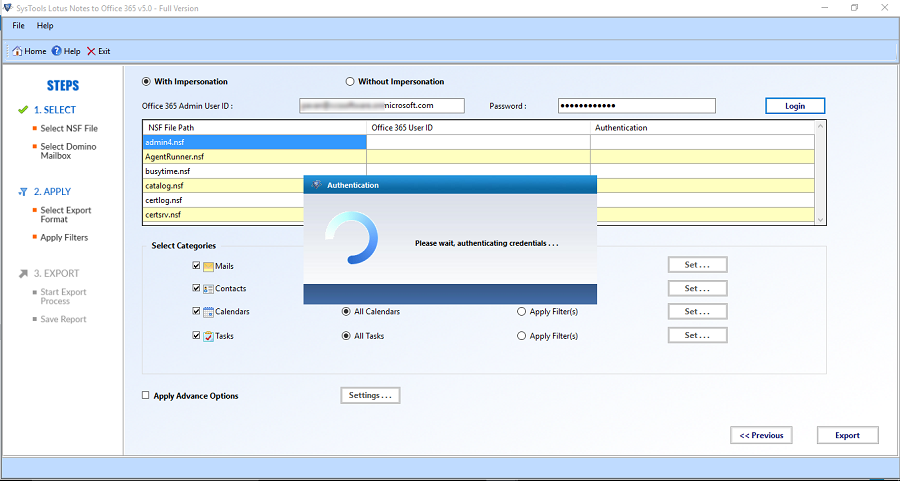
The software will attempt to connect to the domino server application:
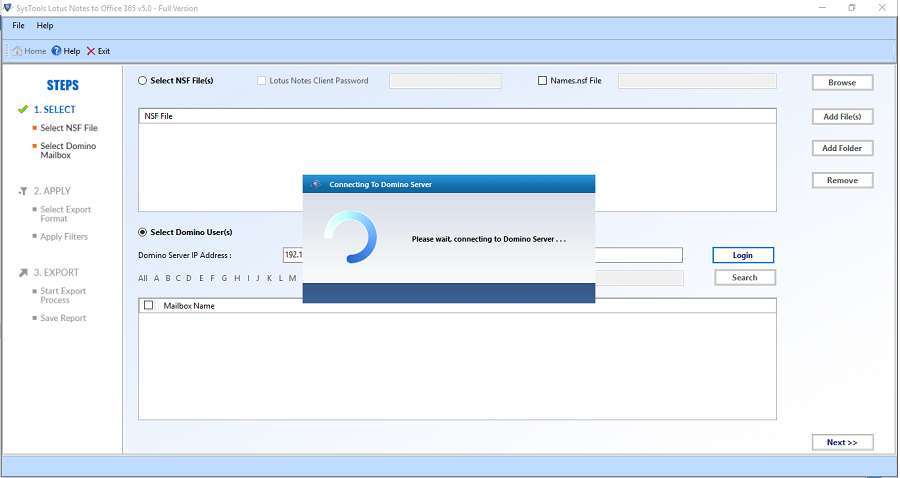
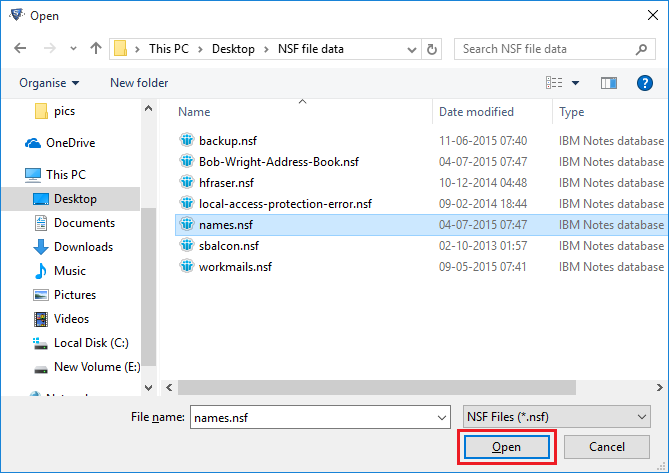
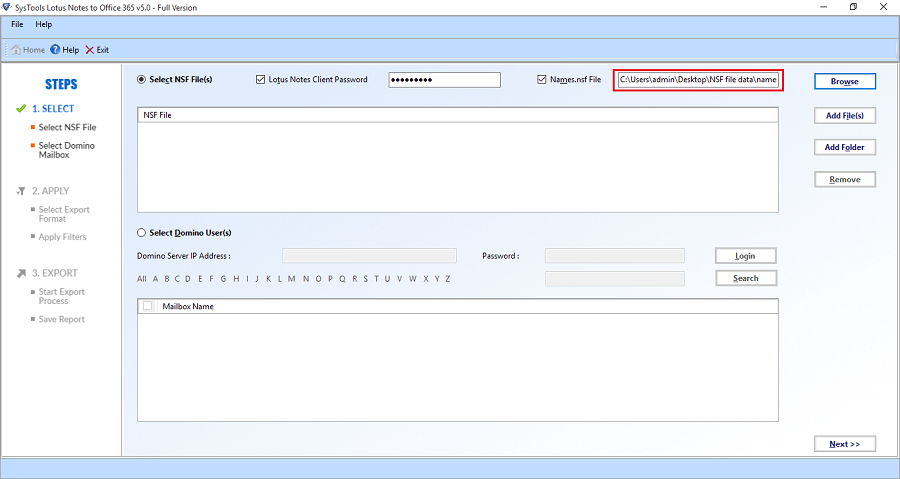
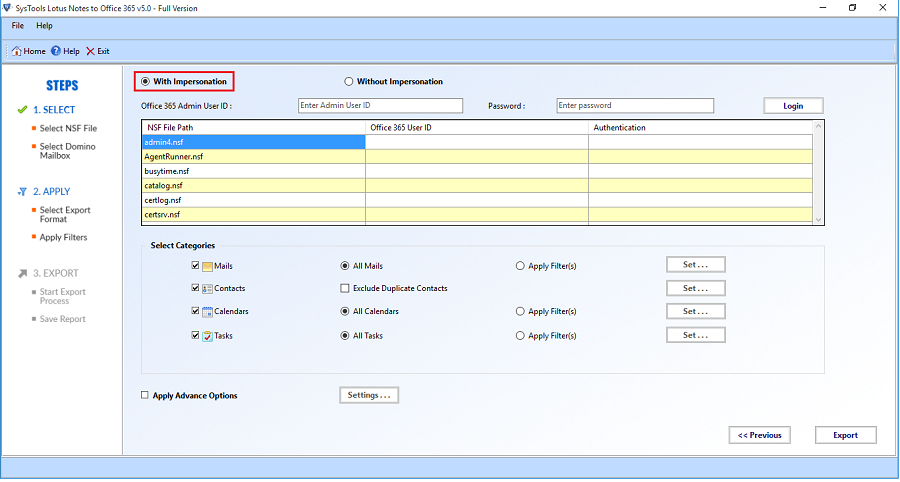
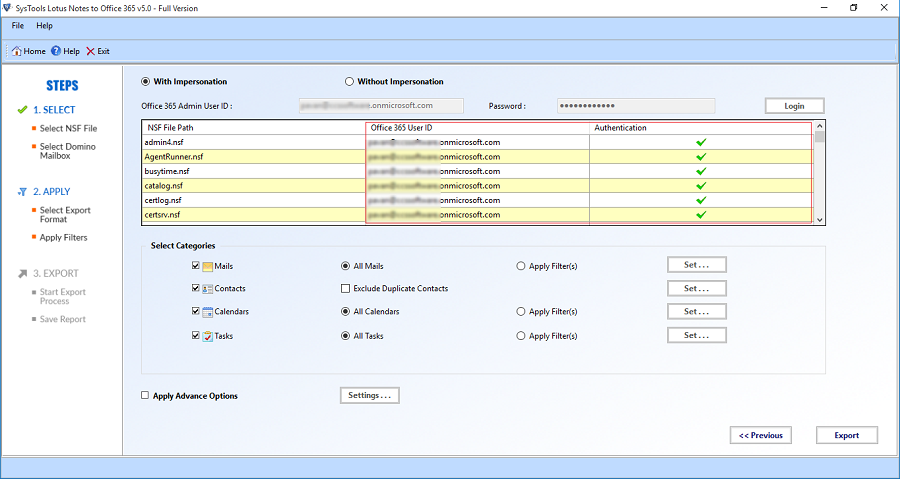
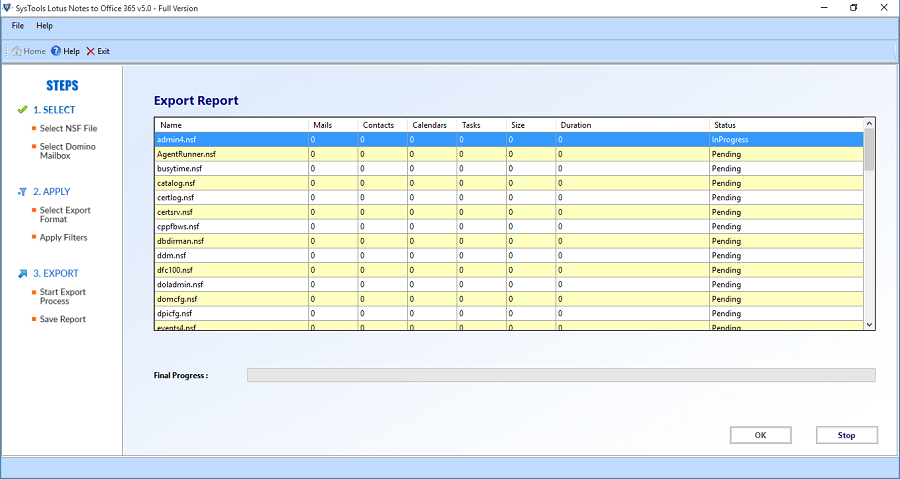
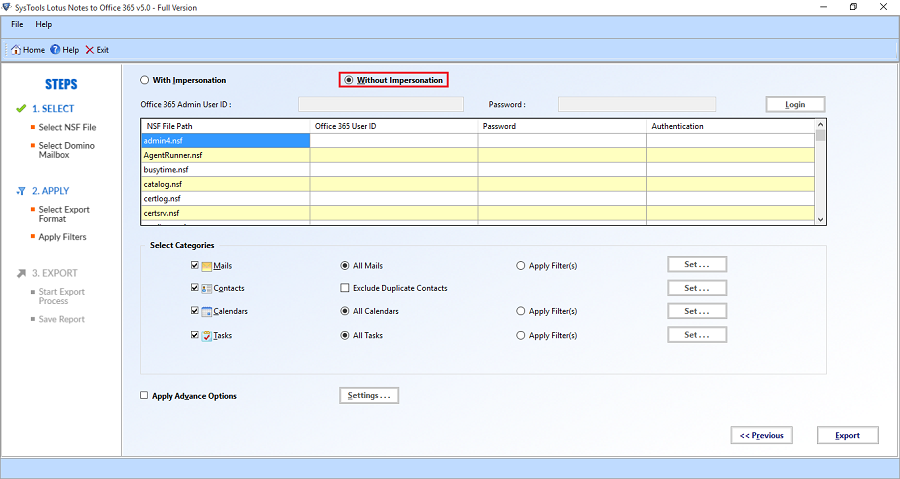
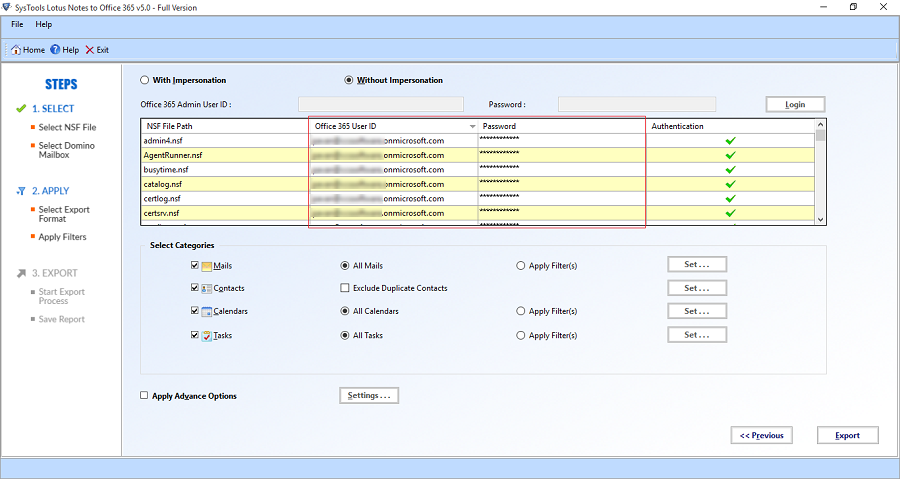
All the files will be displayed as follows, You can select the specific files as follows:
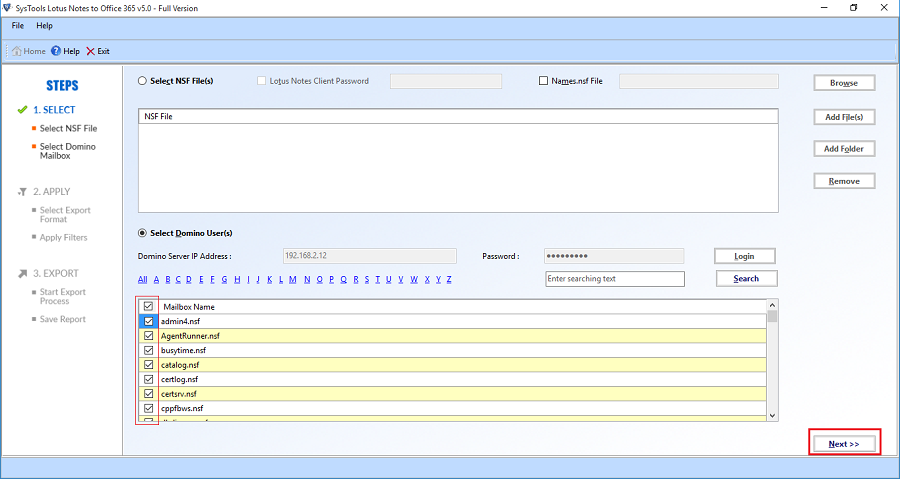
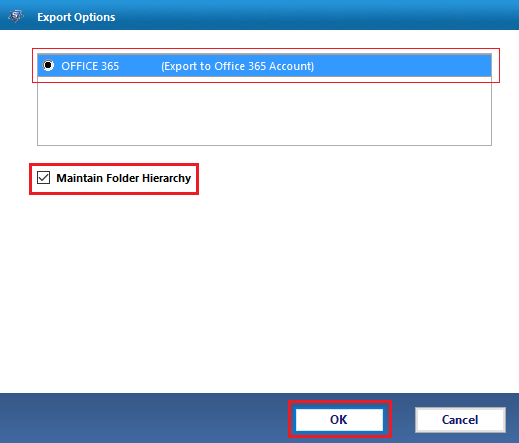
Click on the "Next" button.
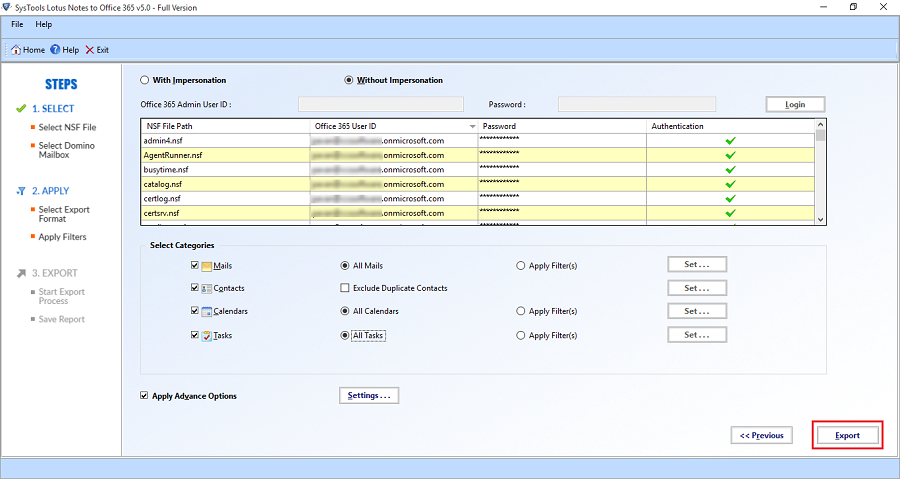
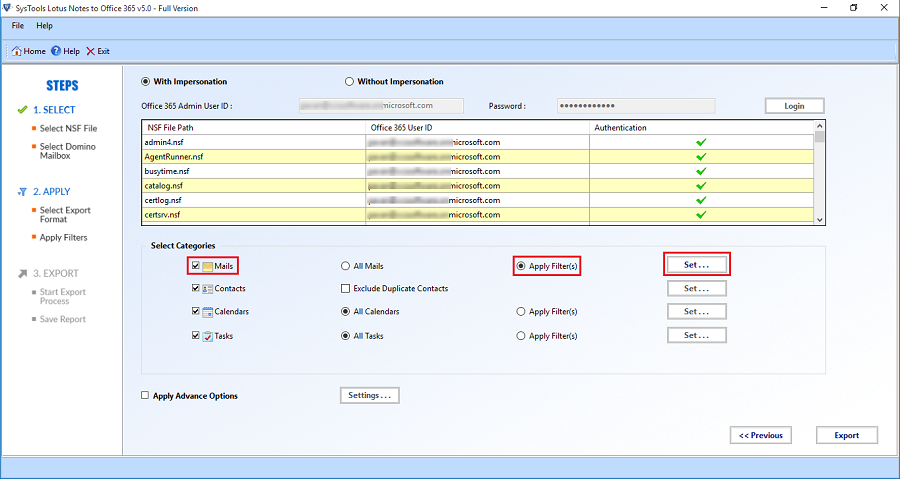
Select the checkbox corresponding to the "Mail" label.
click on the Apply filter(s) filters radio button & click on the "Set" button.
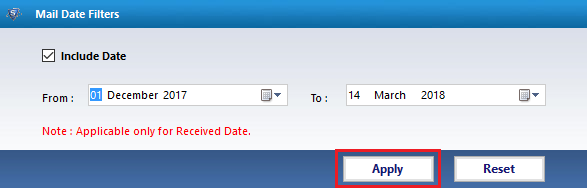
Provide the date filter as follows:
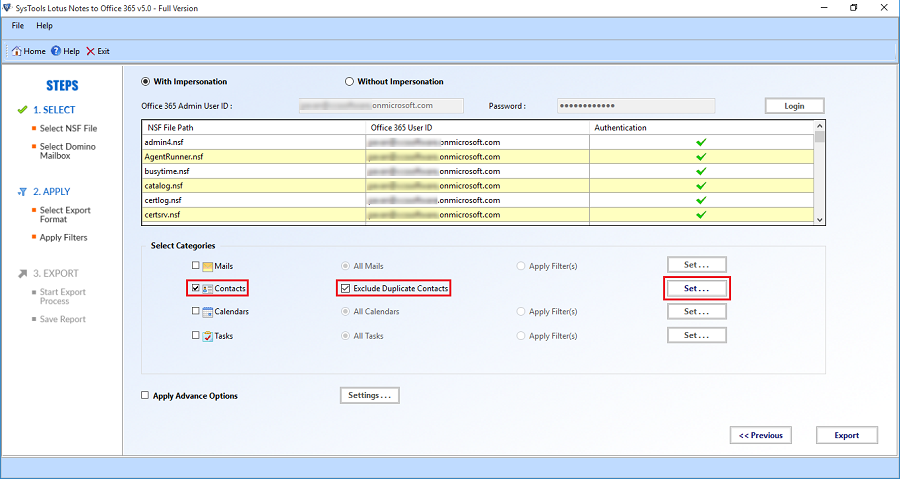
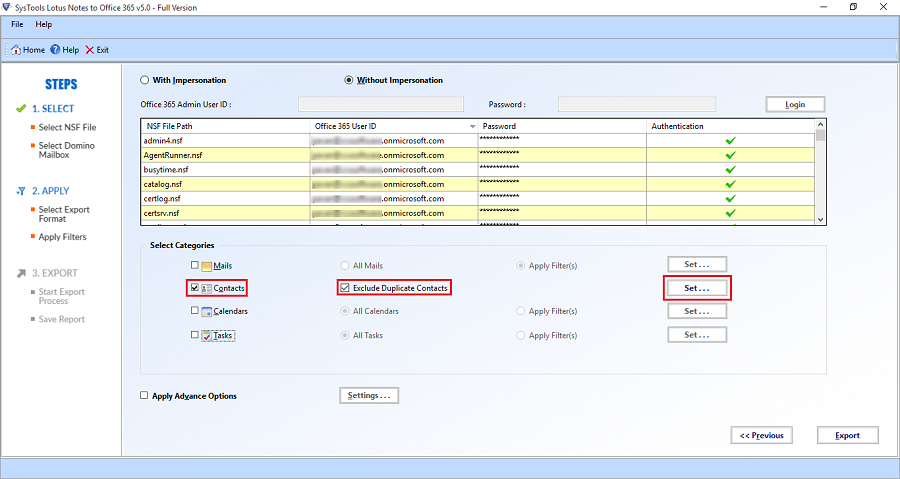
Select the checkbox corresponding to the "Contacts" label.
Click on the Exclude Duplicate Contacts filters radio button & click on the "Set" button.
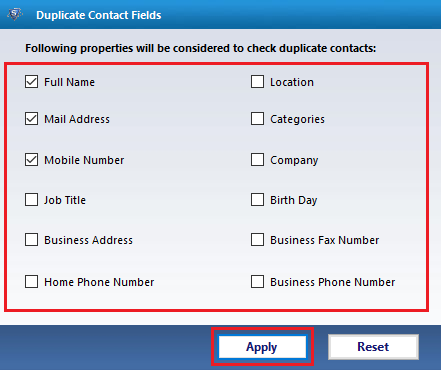
Provide the specific fields on the basis of which the contacts are to be filtered:
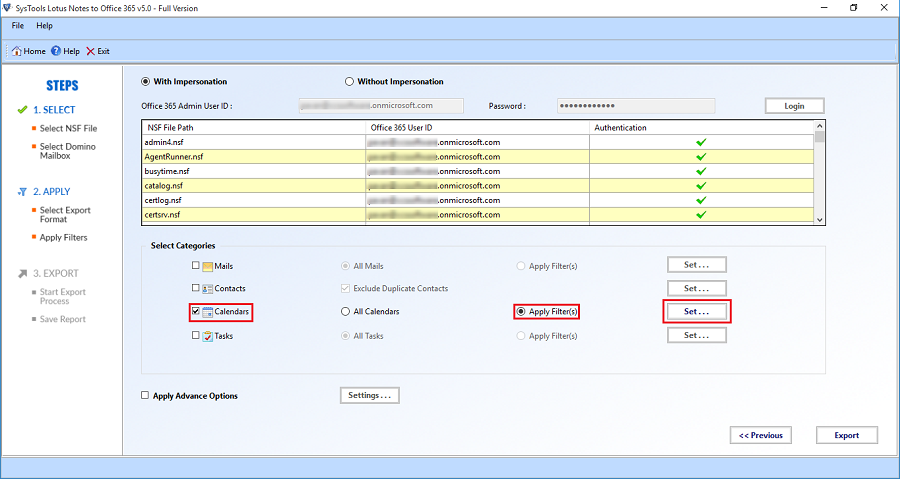
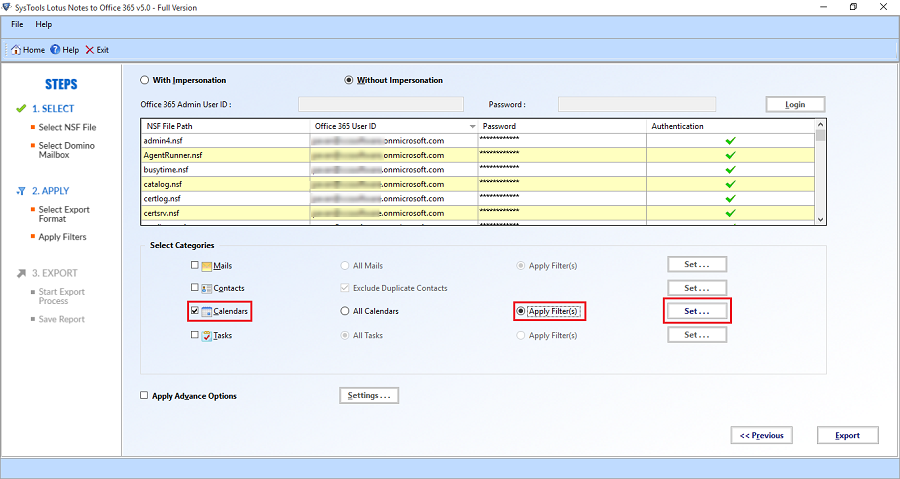
Select the checkbox corresponding to the "Calendars" label.
click on the Apply filter(s) filters radio button and click on the "Set" button.
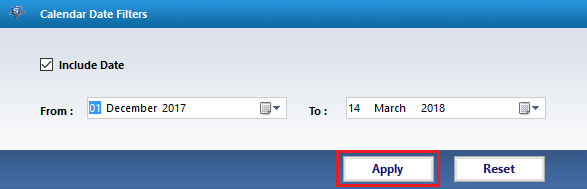
Provide the date filter as follows:
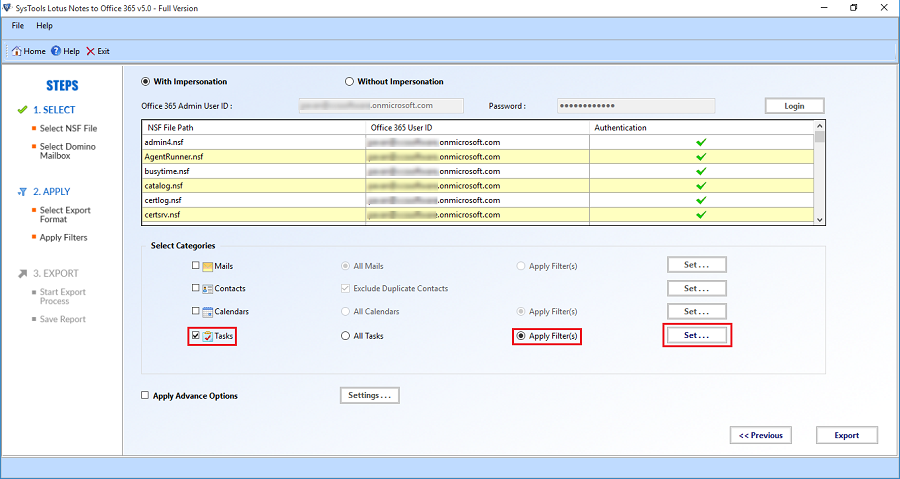
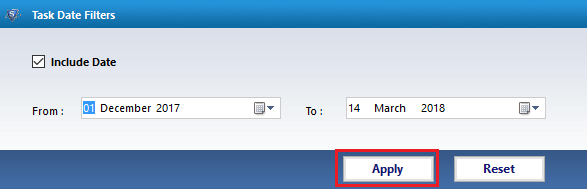
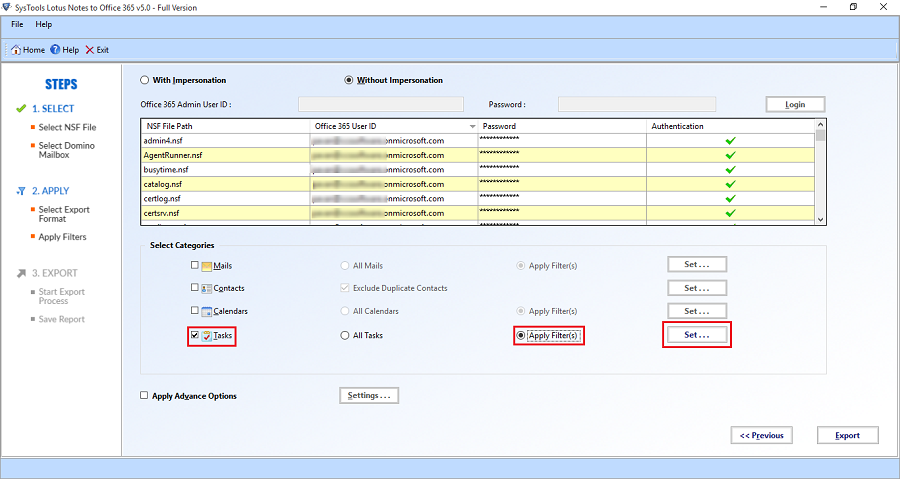
Select the checkbox corresponding to the "Tasks" label.
click on the Apply filter(s) filters radio button & click on the "Set" button.
Provide the date filter as follows:
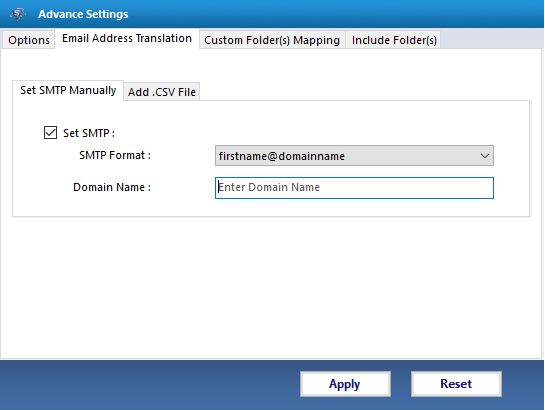
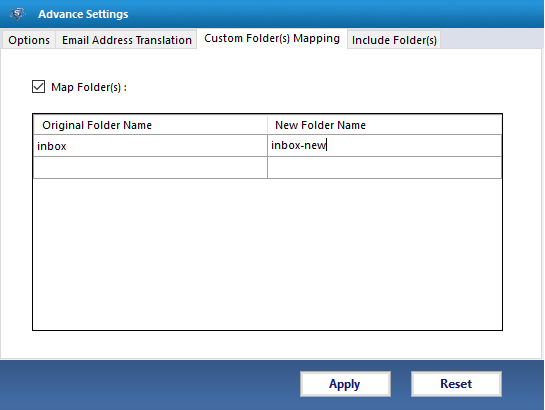
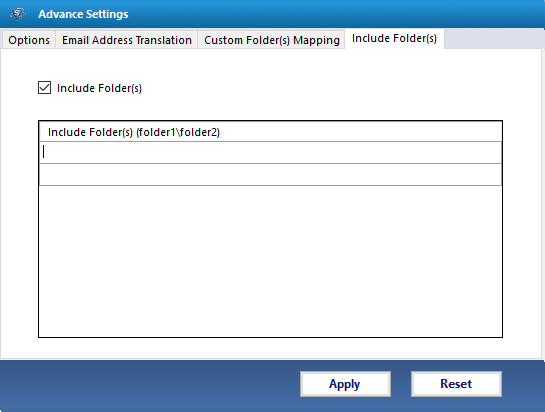
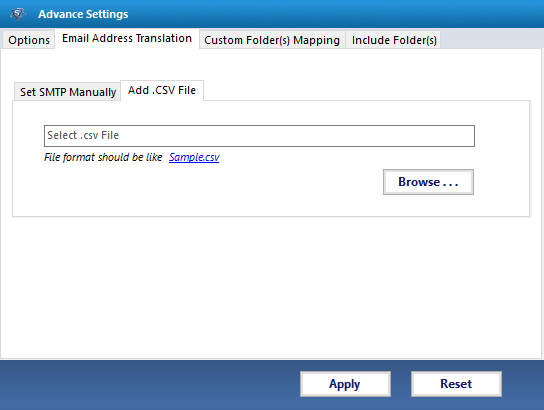
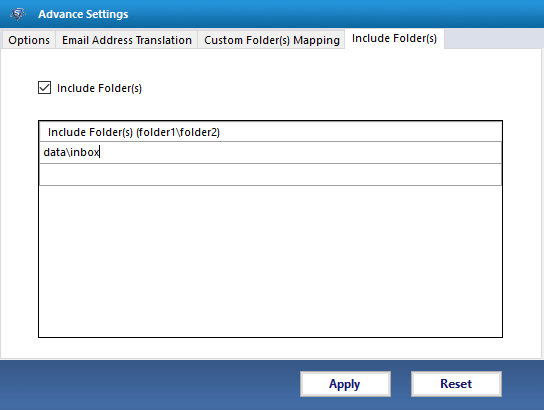
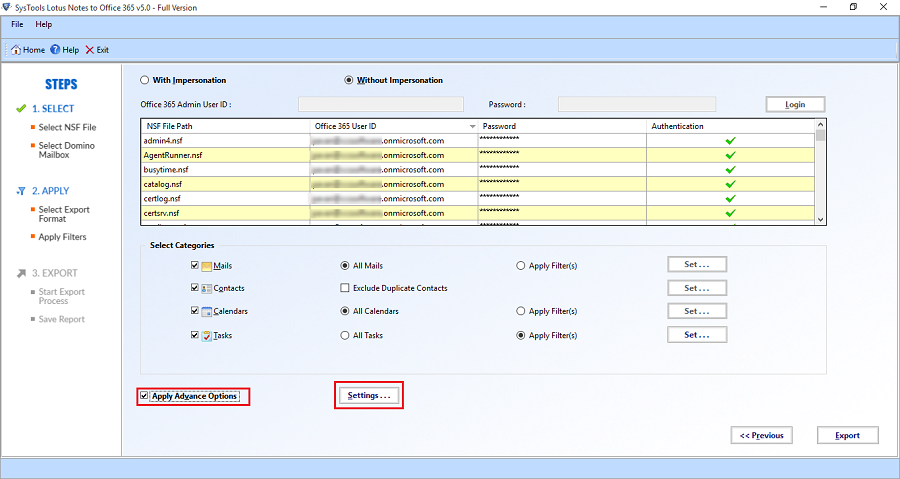
Now, select the checkbox corresponding to Apply Advance settings label & click on the corresponding settings... button.
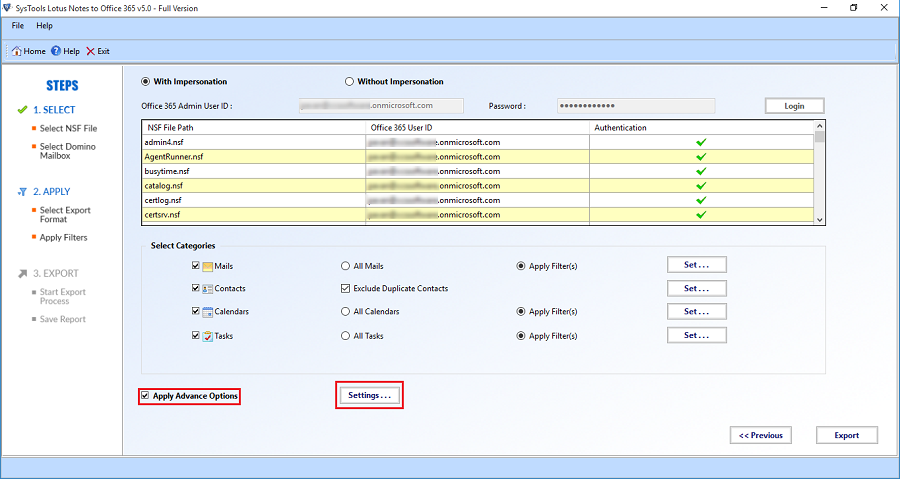
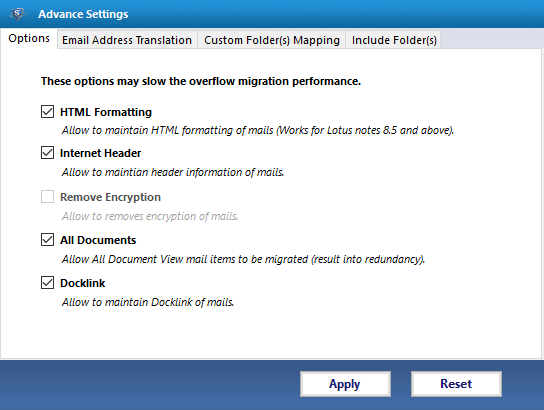
The following options would be available for the advance settings.

Now choose the Advanced Settings for successful Lotus Notes migration.
HTML Formatting - This option lets you maintain all HTML formatting of emails during the process of its conversion.
Internet Header – This option maintain the sent or received email header.
Remove Encryption - This option let you remove the encryption of mails.
All Documents – Allow all document view mail items to be migrated into PST.
Doclink – Allow to maintain Doclink of mails.
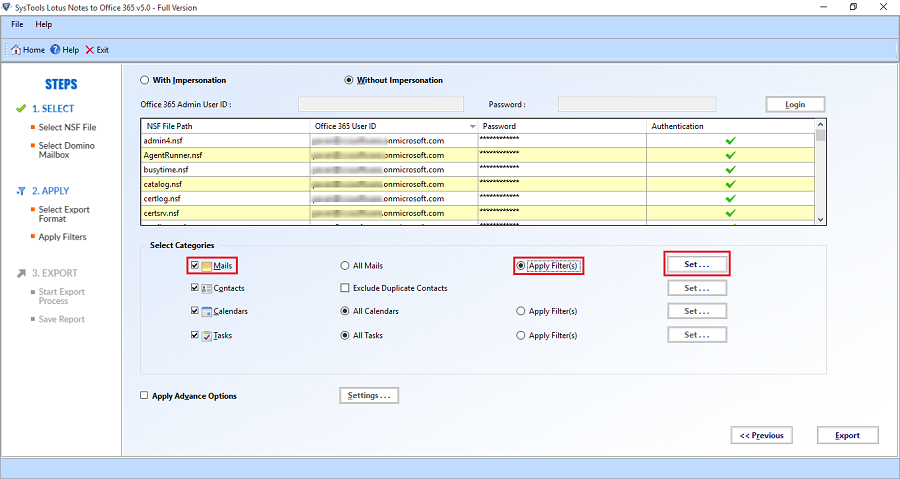
Select the checkbox corresponding to the "Mail" label.
click on the Apply filter(s) filters radio button & click on the "Set" button.
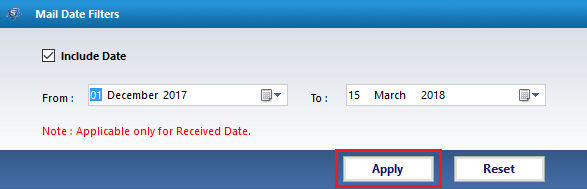
Provide the date filter as follows:
Select the checkbox corresponding to the "Contacts" label.
Click on the Exclude Duplicate Contacts filters radio button & click on the "Set" button.
Provide the specific fields on the basis of which the contacts are to be filtered:

Select the checkbox corresponding to the "Calendars" label.
click on the Apply filter(s) filters radio button and click on the "Set" button.
Provide the date filter as follows:

Select the checkbox corresponding to the "Tasks" label.
click on the Apply filter(s) filters radio button & click on the "Set" button.
Provide the date filter as follows:

Now, select the checkbox corresponding to Apply Advance settings label & click on the corresponding settings... button.
The following options would be available for the advance settings.
Now choose the Advanced Settings for successful Lotus Notes migration.
HTML Formatting - This option lets you maintain all HTML formatting of emails during the process of its conversion.
Internet Header – This option maintain the sent or received email header.
Remove Encryption - This option let you remove the encryption of mails.
All Documents – Allow all document view mail items to be migrated into PST.
Doclink – Allow to maintain Doclink of mails.